

Managing users becomes more challenging as your WooCommerce store grows. Tasks such as migrating to a new site, backing up user data, updating user details, or syncing multiple stores can be slow and error-prone when done manually.
Importing and exporting users with a CSV file makes these tasks much easier. You can move, update, or back up user data in bulk instead of editing each user individually.
In this guide, we’ll show you how to import and export WordPress users using the free Import Export WordPress Users plugin.
Exporting WordPress Users
Exporting WordPress users involves two steps: exporting user data from the source site as a CSV file and importing it into the destination site. Before you begin, install and activate the free WordPress User Import Export plugin by WebToffee.
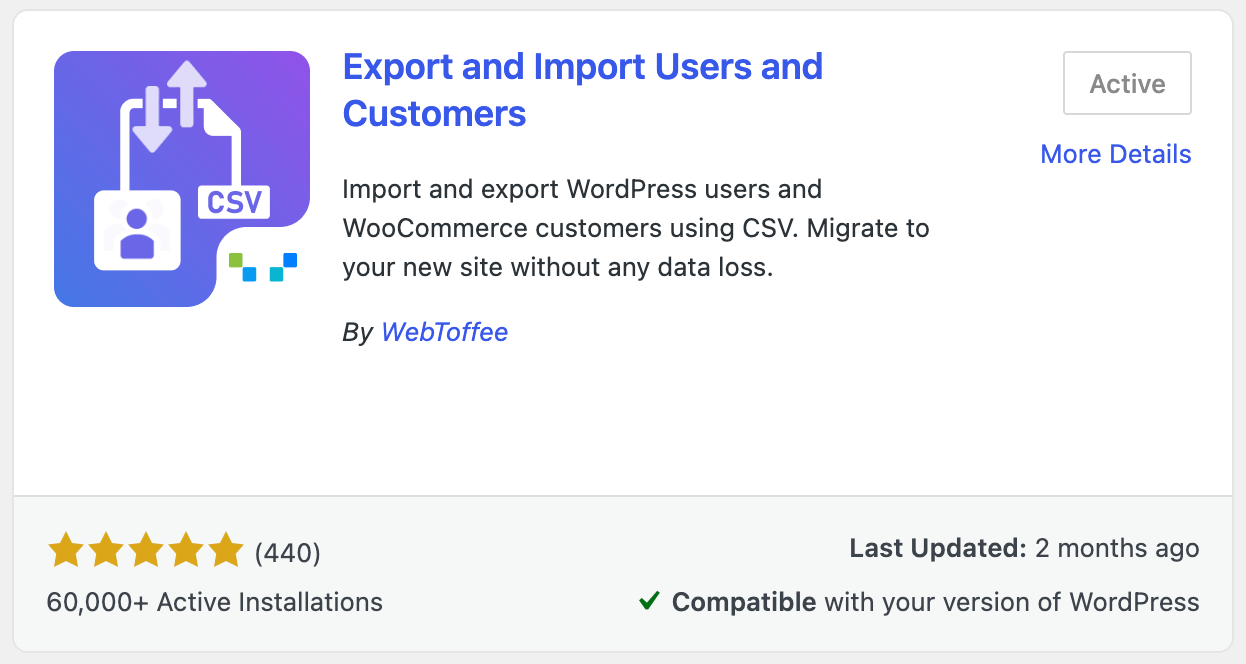
Step 1: Install WebToffee Import Export WordPress Users Plugin
- Log in to your WordPress dashboard and go to Plugins > Add New.
- Search for “Import Export WordPress Users” by WebToffee.
- Install and activate the plugin.
Step 2: Select User as Post Type
Once the plugin is installed,
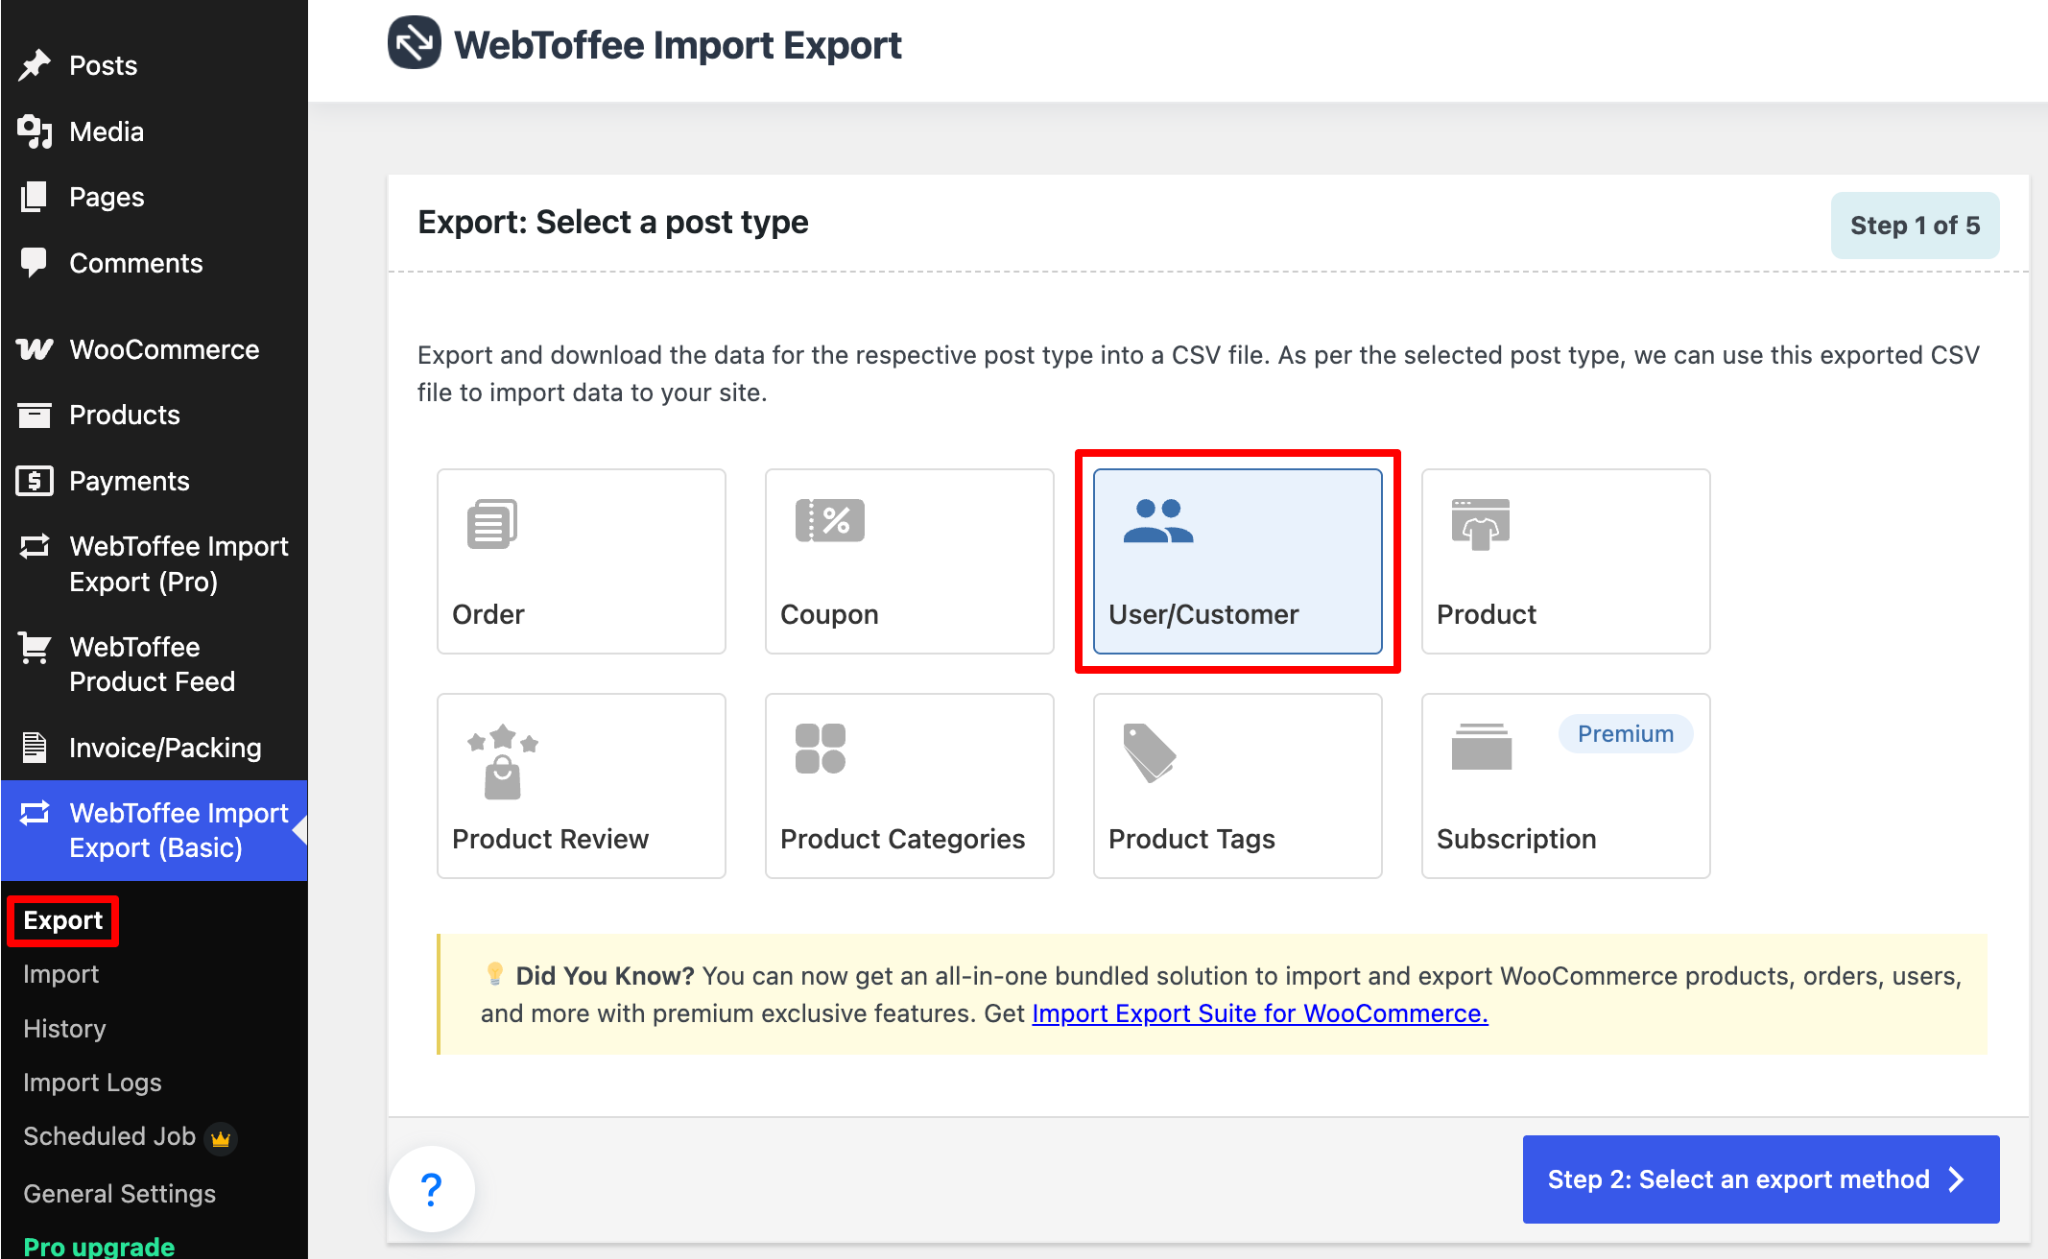
- Go to WebToffee Import/Export (Basic)> Export.
- Choose User/Customer as the post type.
Step 3: Choose an Export Method
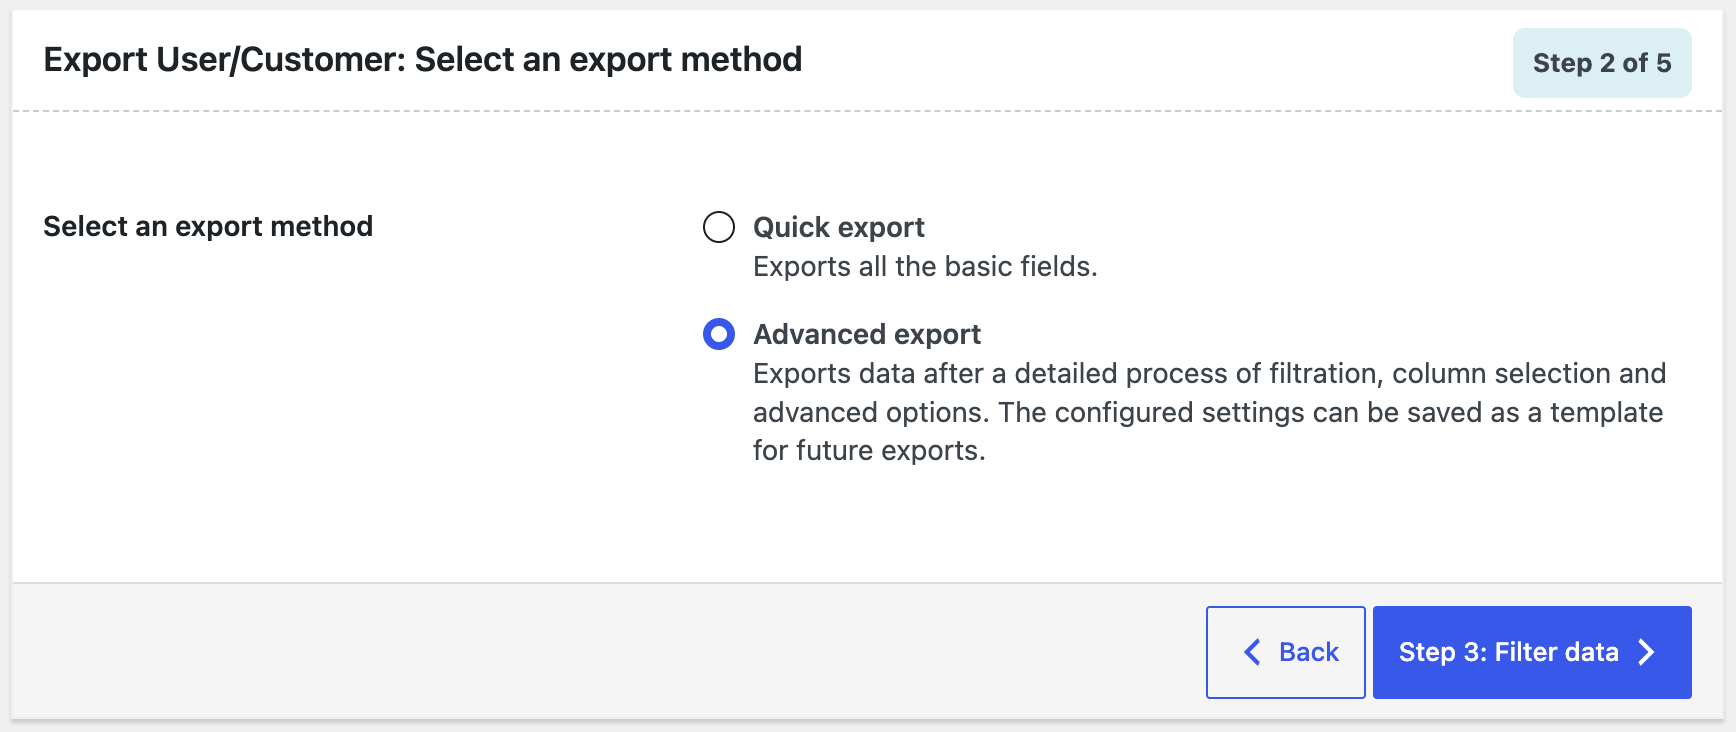
Choose an export method based on your needs:
- Quick Export: Exports all users using the default settings.
- Advanced Export: Lets you filter users, choose specific columns, and customize export settings before generating the CSV file.
Step 4: Filter User Data
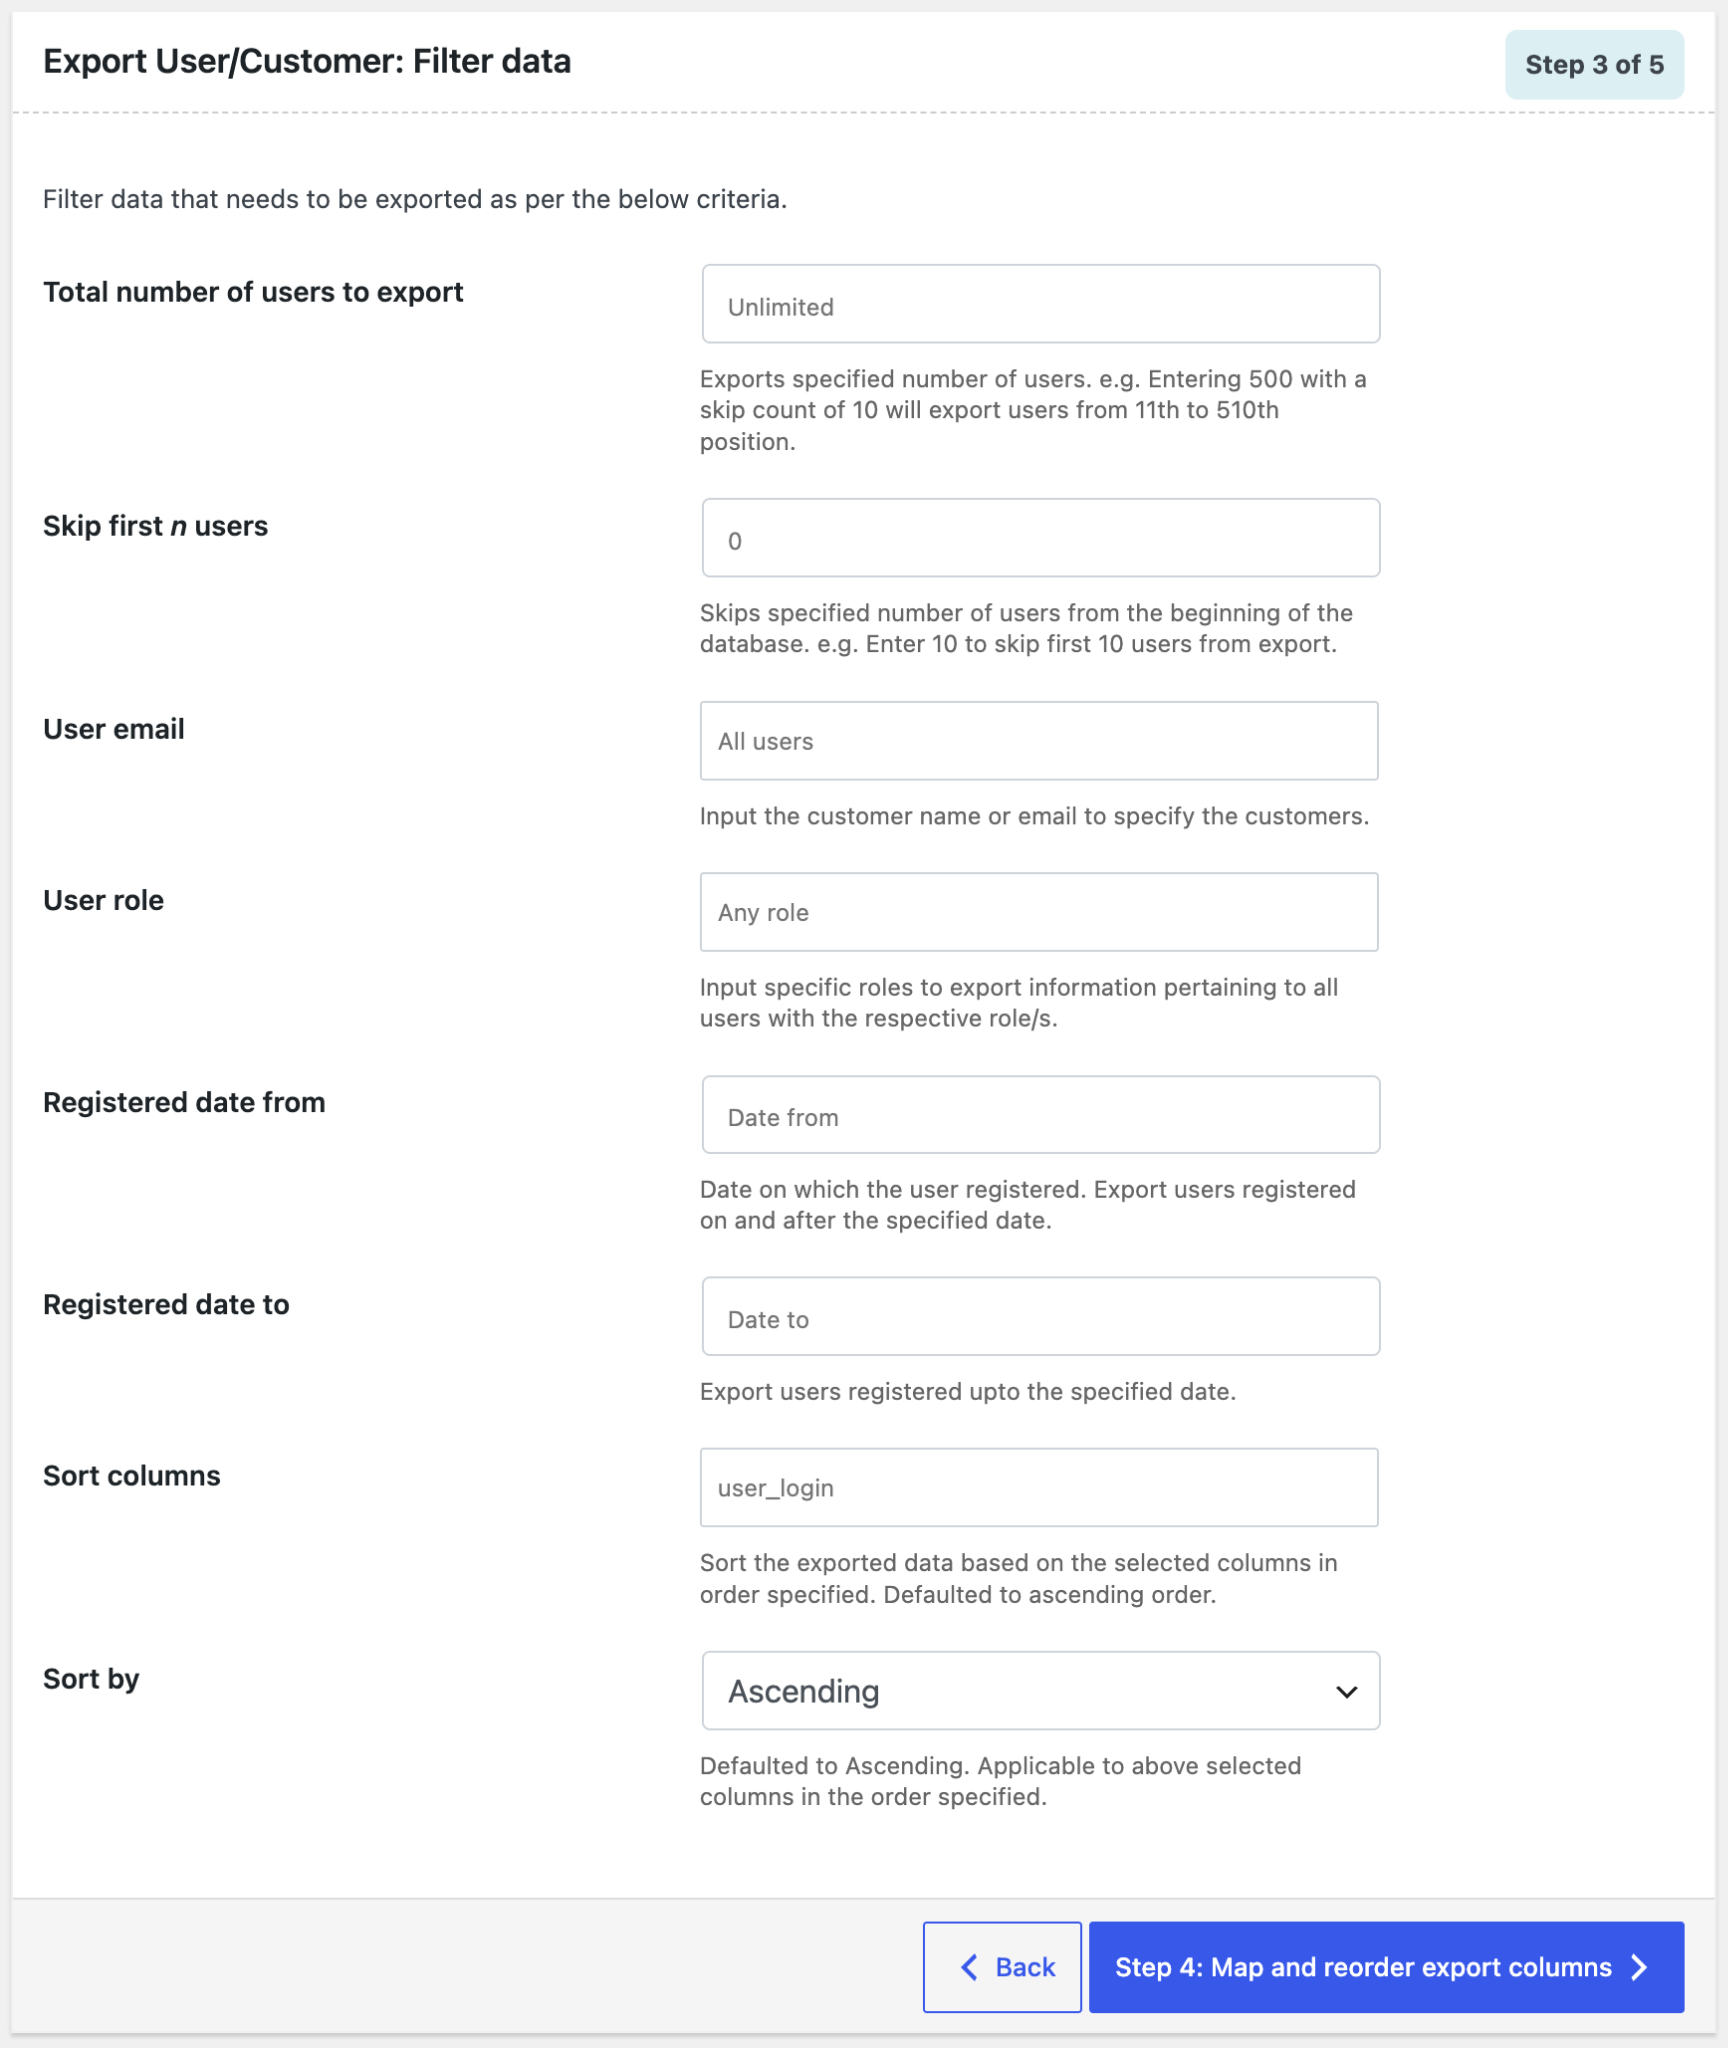
Apply filters to export only the users you need. You can limit the number of users, exclude specific users, or set conditions to include only relevant user data in the export.
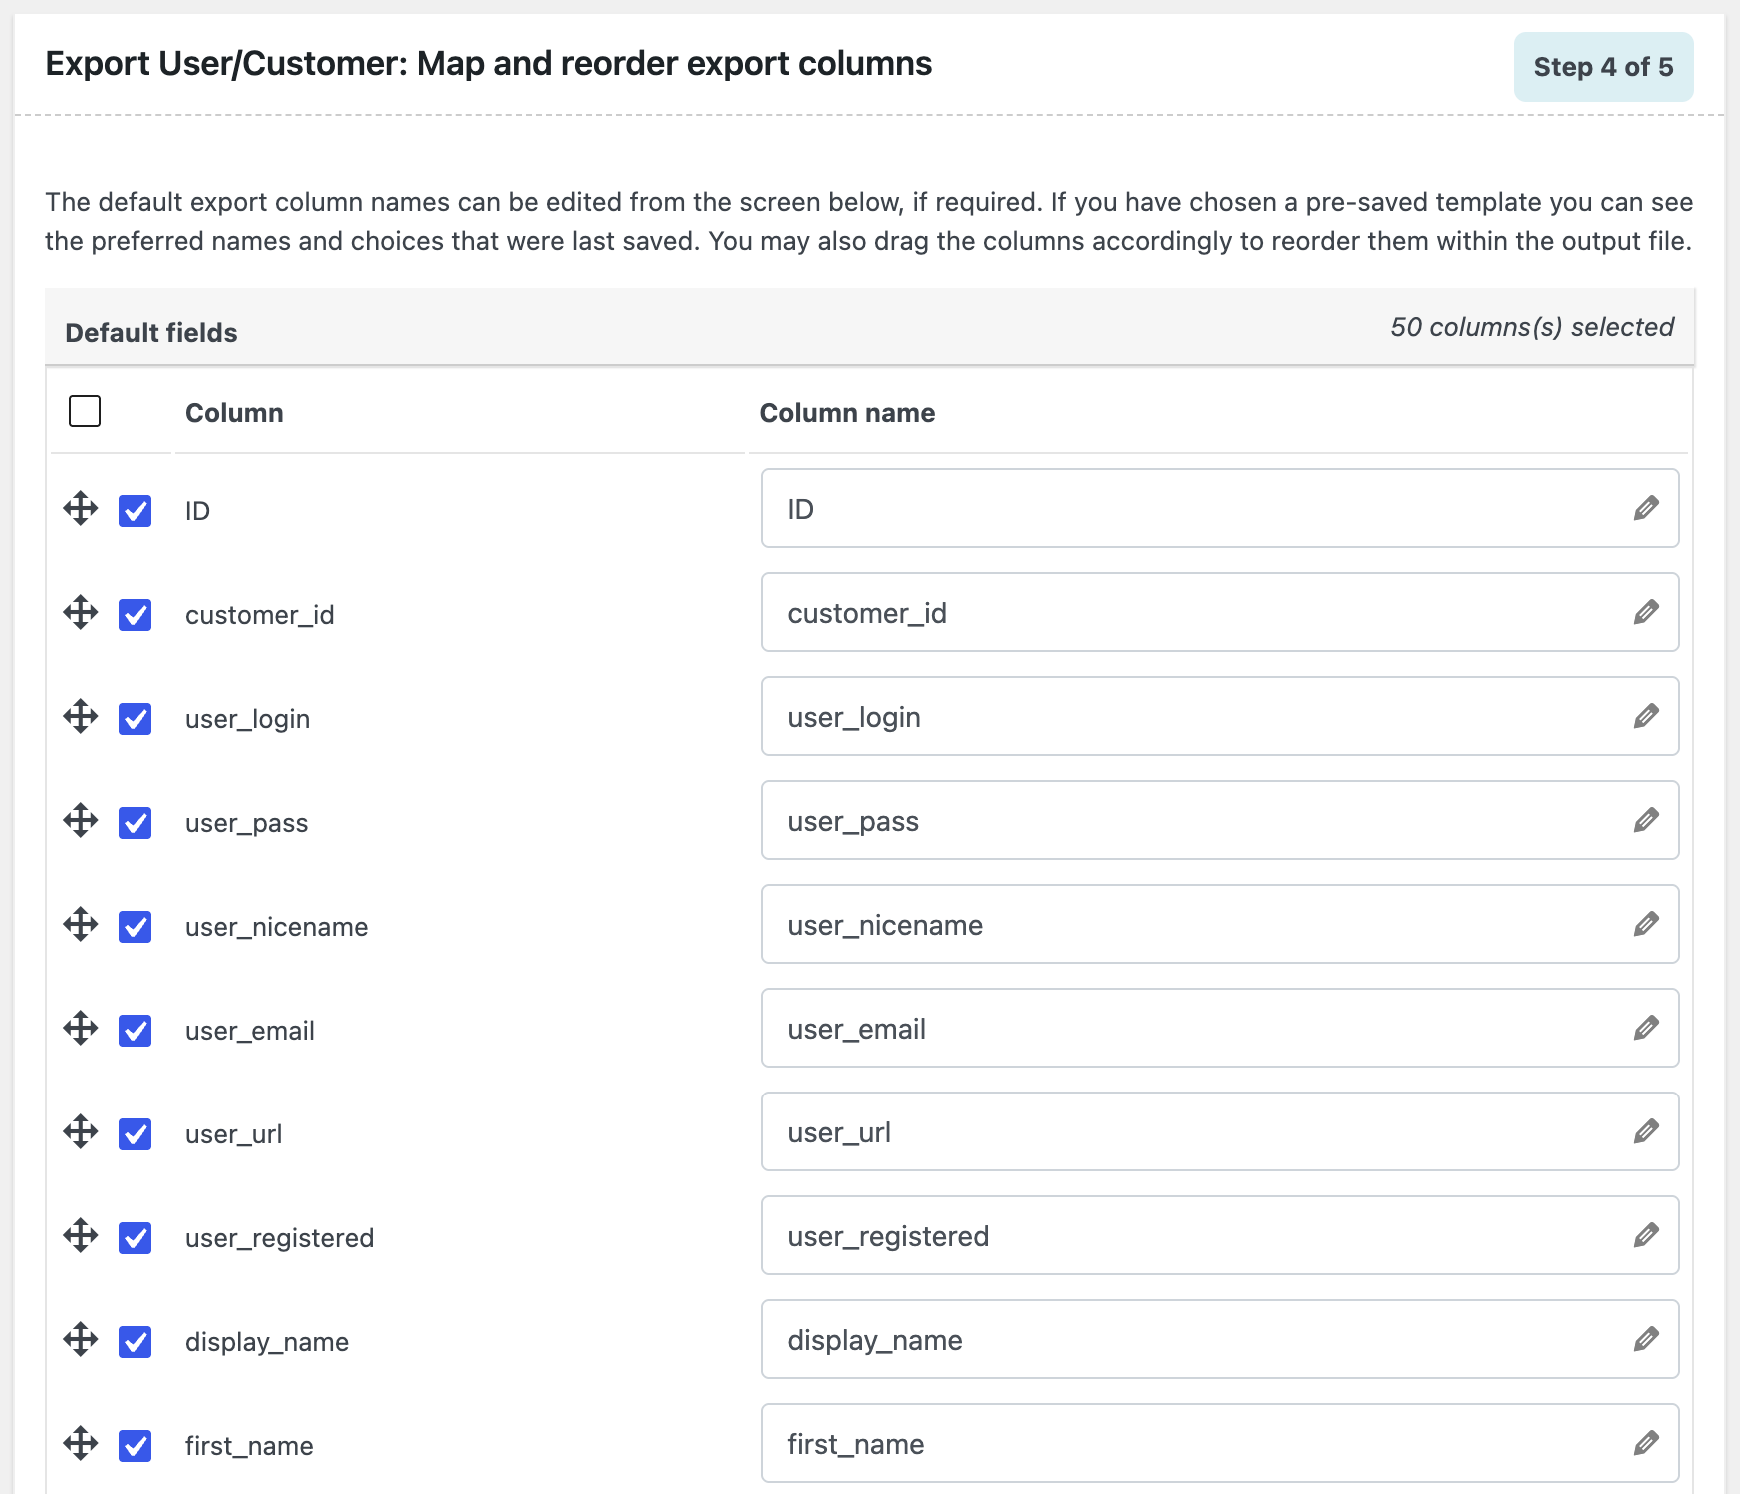
Step 5: Map and Reorder User Export Columns
Review the export columns before generating the CSV. By default, the plugin field names match the CSV column names, but you can rename column headers or reorder the columns to suit your requirements.
Once you’re done, proceed to the next step.
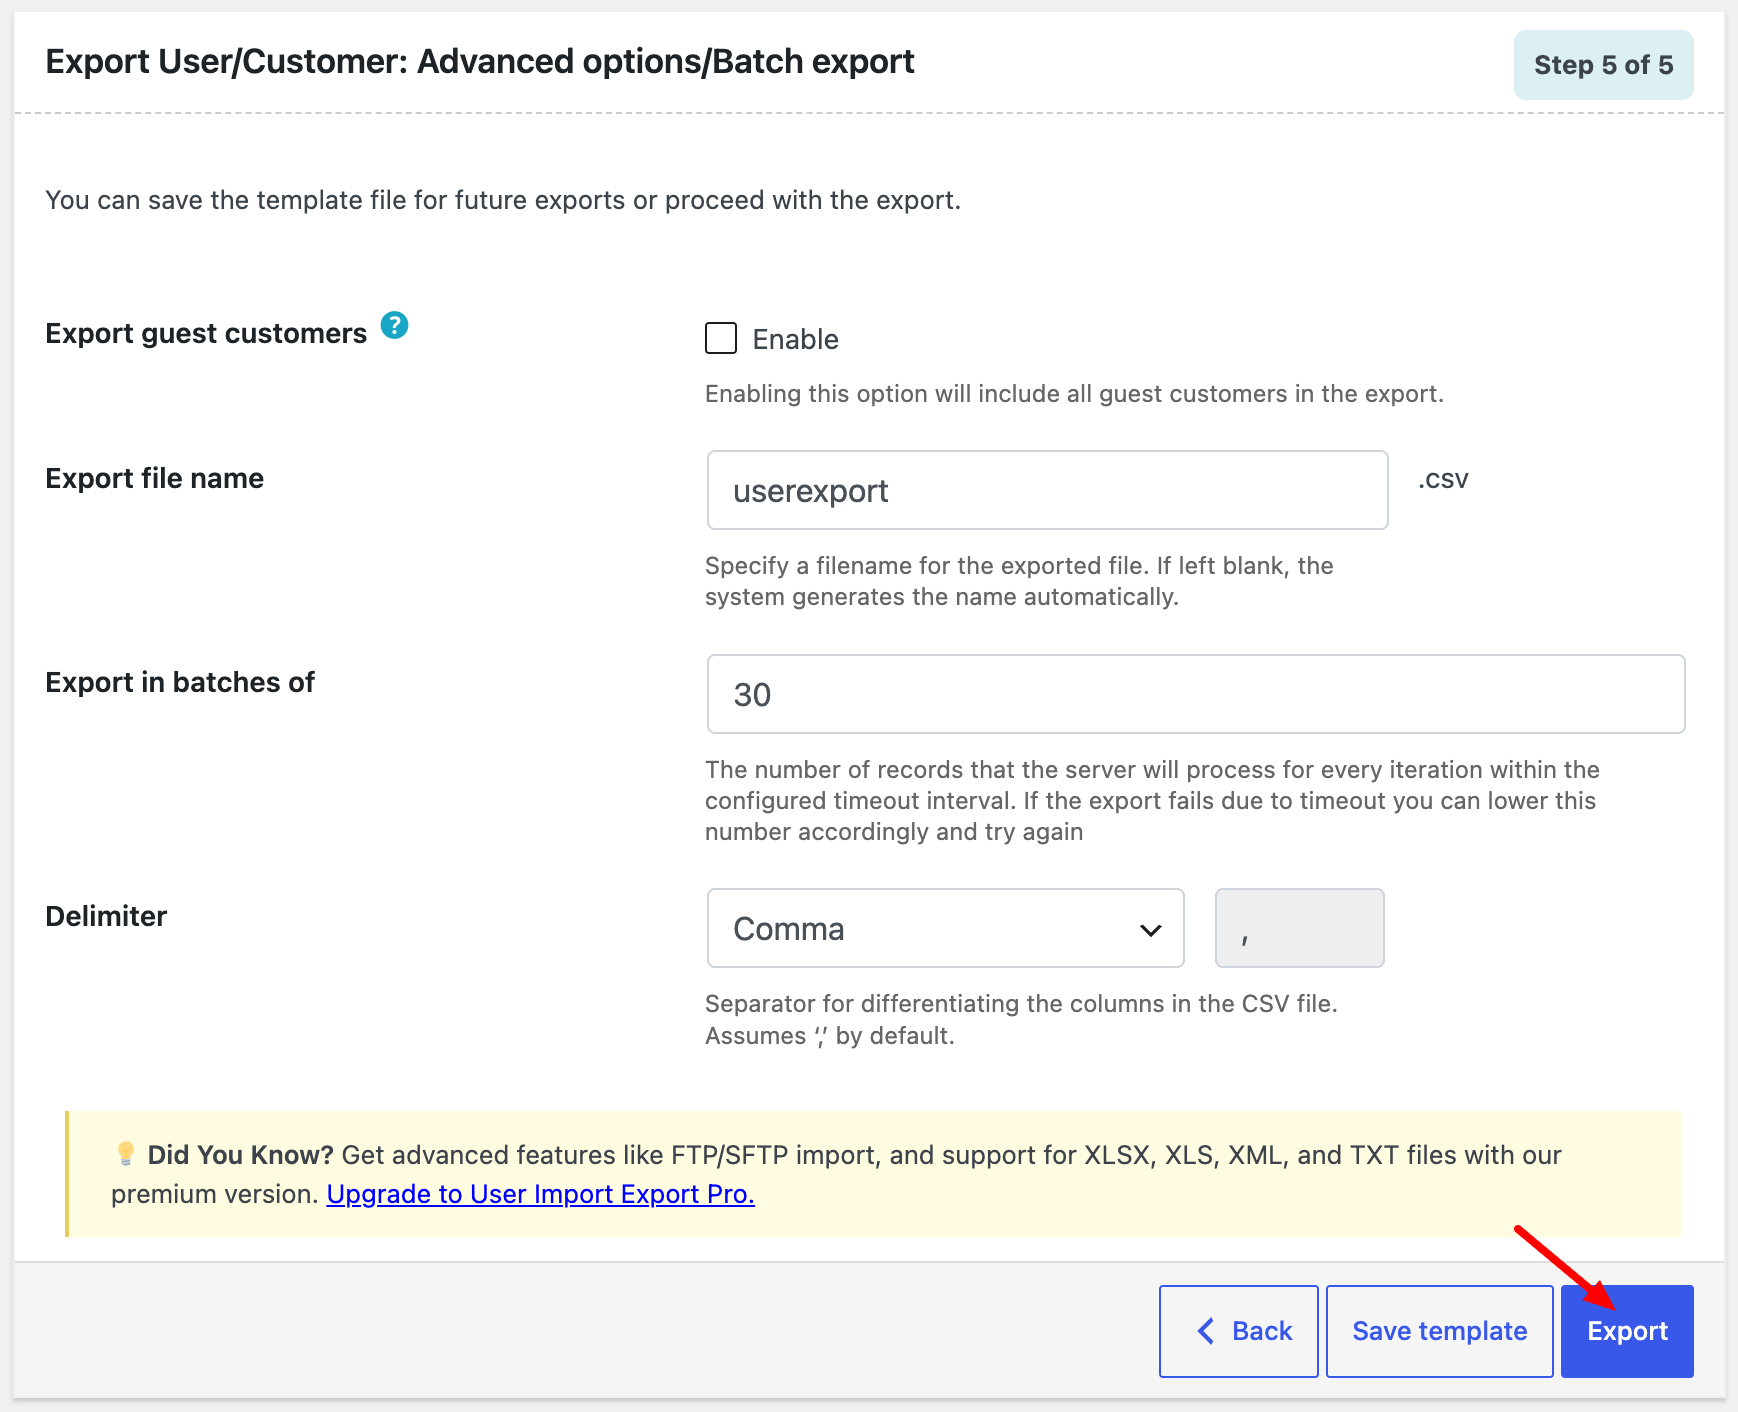
Step 6: Set Up Advanced Export Options
In this step, configure the final export settings:
- Include guest users: Add guest customers to the export.
- Batch size: Set the number of records processed in each batch.
- File name: Enter a name for the CSV file.
- Delimiter: Choose the character used to separate columns. A comma is selected by default.
- Save template: Save these settings for future exports.
Once configured, click Export to generate and download the CSV file containing your users.
Once the export is complete, a confirmation message will appear. Click Download File to save the exported CSV to your computer.
Importing WordPress Users
Now that you’ve exported your users, you can import them into the destination site using the same plugin. The process takes just a few clicks and preserves your existing user and customer data.
Let’s go through the import steps.
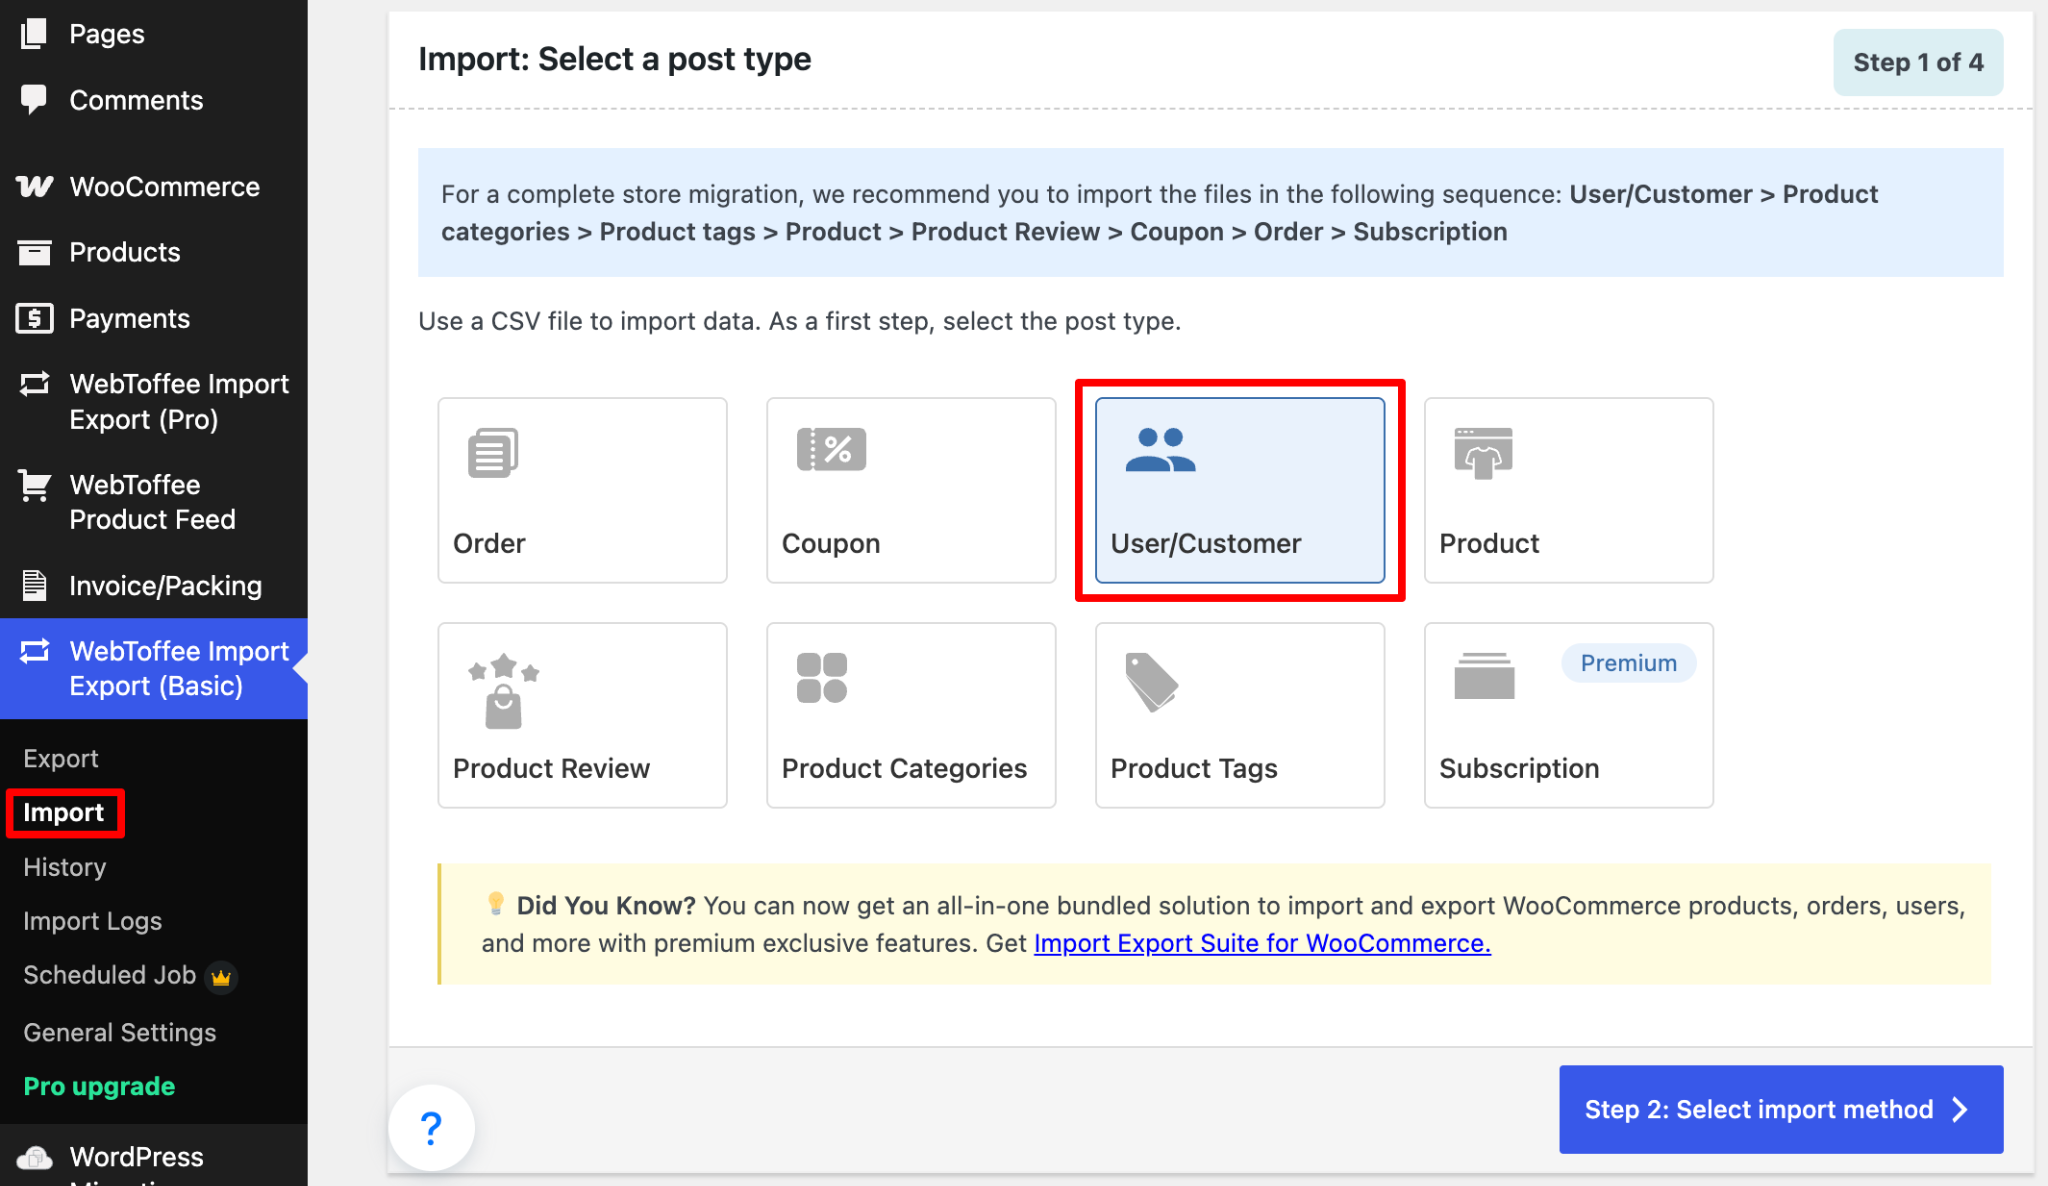
Step 1: Select User/Customer as Post Type
- From your WordPress dashboard, go to WebToffee Import/Export (Basic)>Import.
- Choose Users/Customers
- Click the Select import method button to proceed.
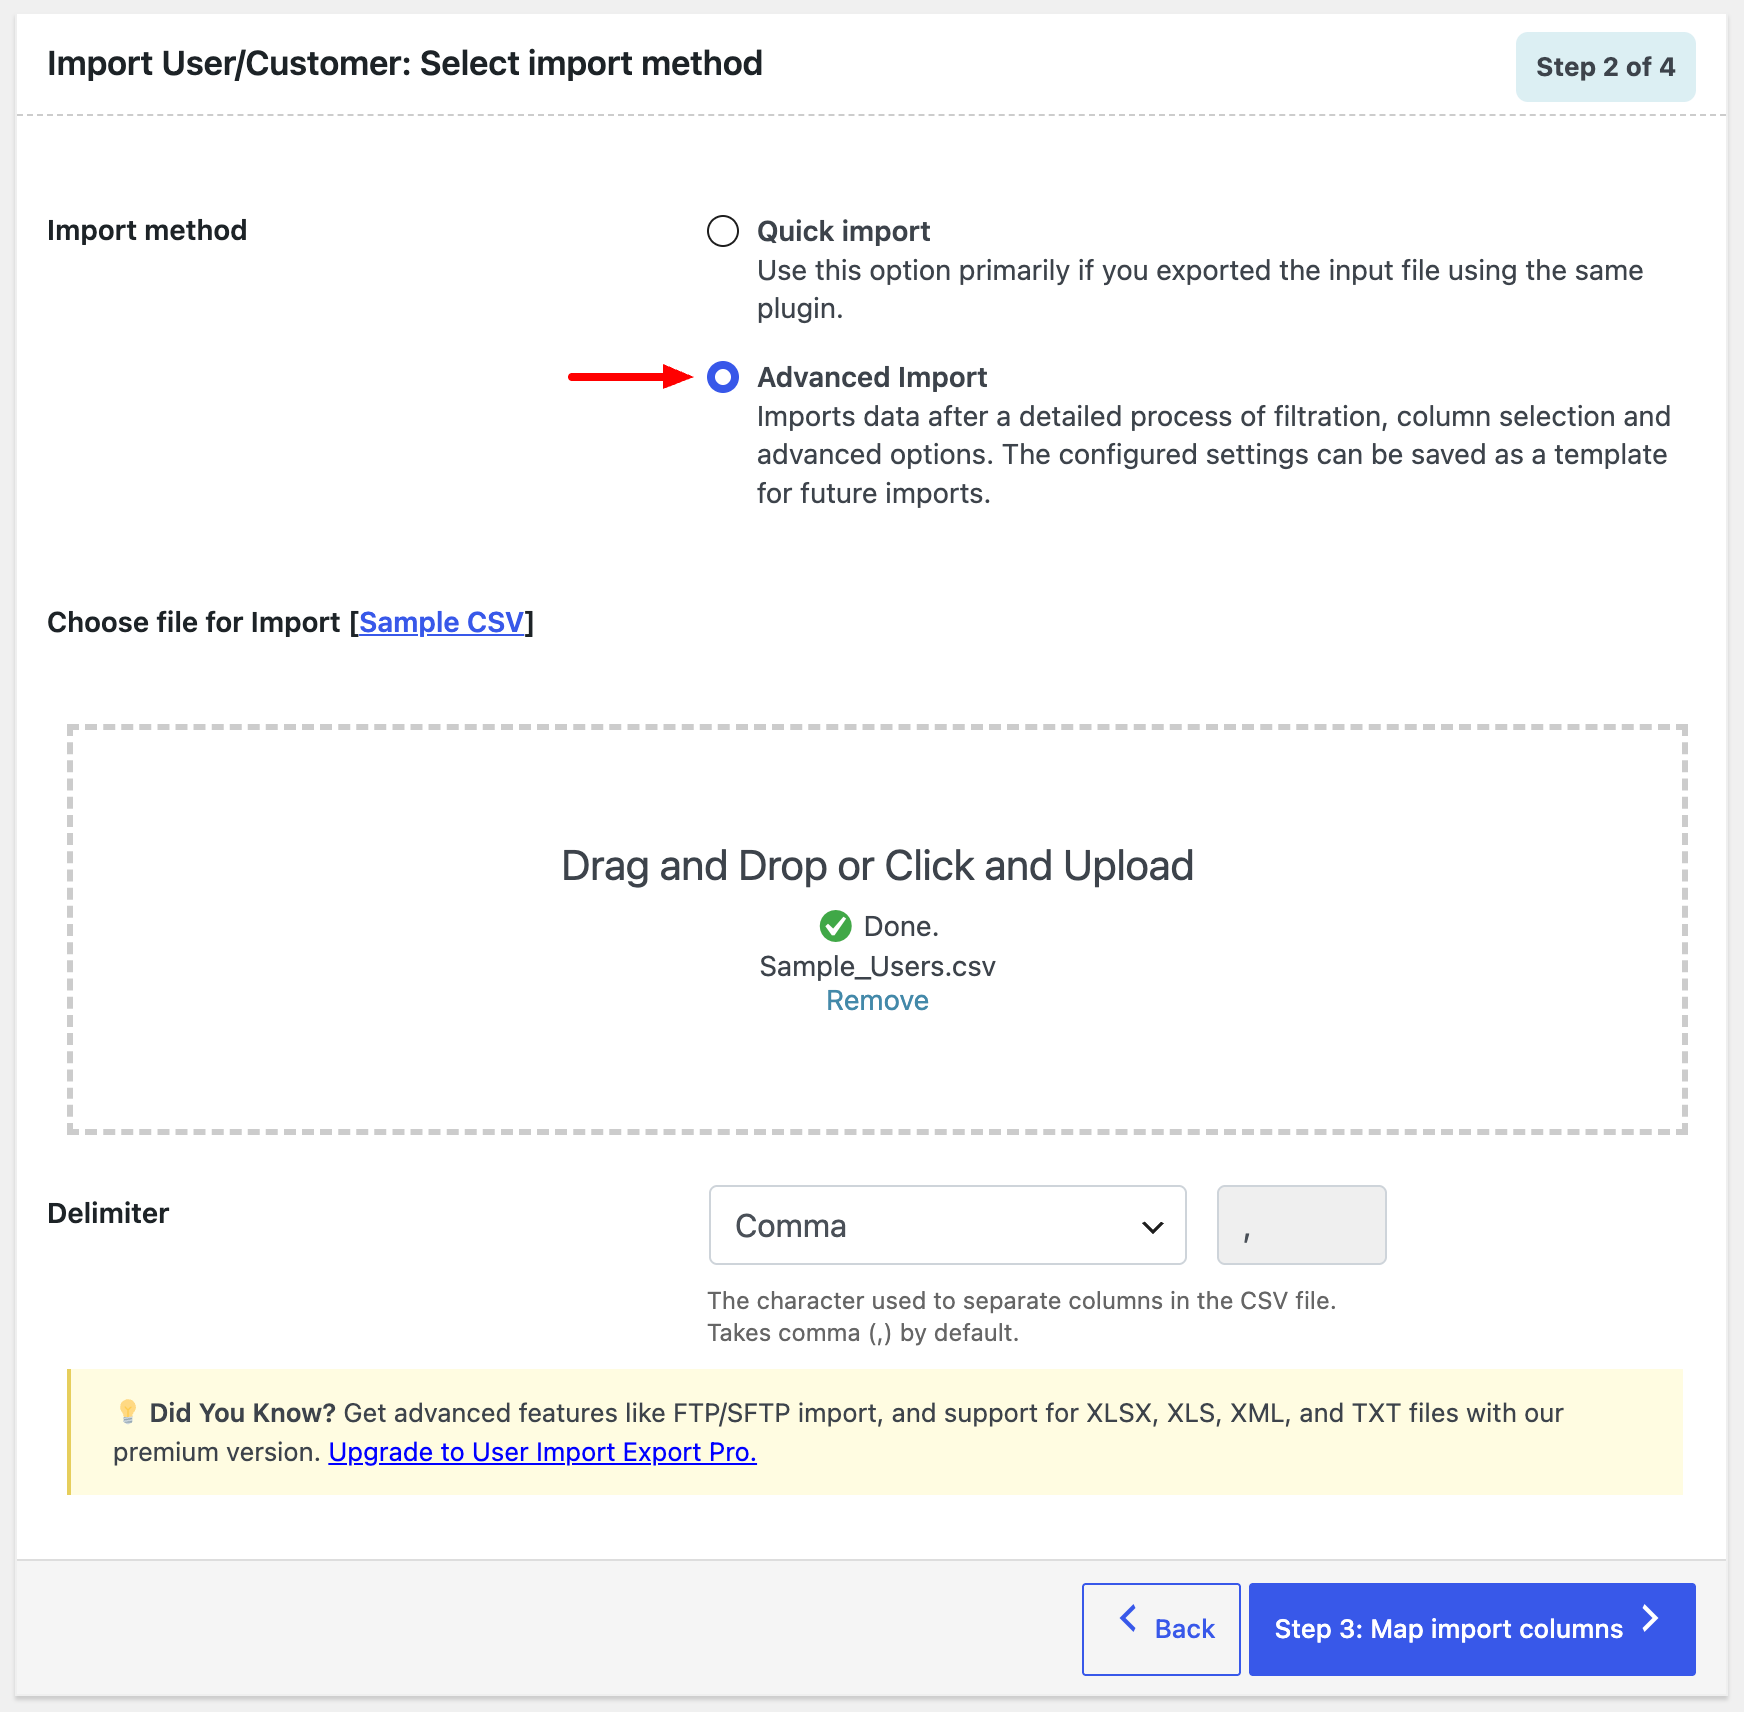
Step 2: Select Import Method
Choose an import method. You can use Quick Import or Advanced Import. For this guide, select Advanced Import.
Next, upload the CSV file by dragging it into the upload area or browsing your computer. Then, choose the delimiter used in the file, such as a comma, semicolon, or tab.
Once configured, proceed to the next step.
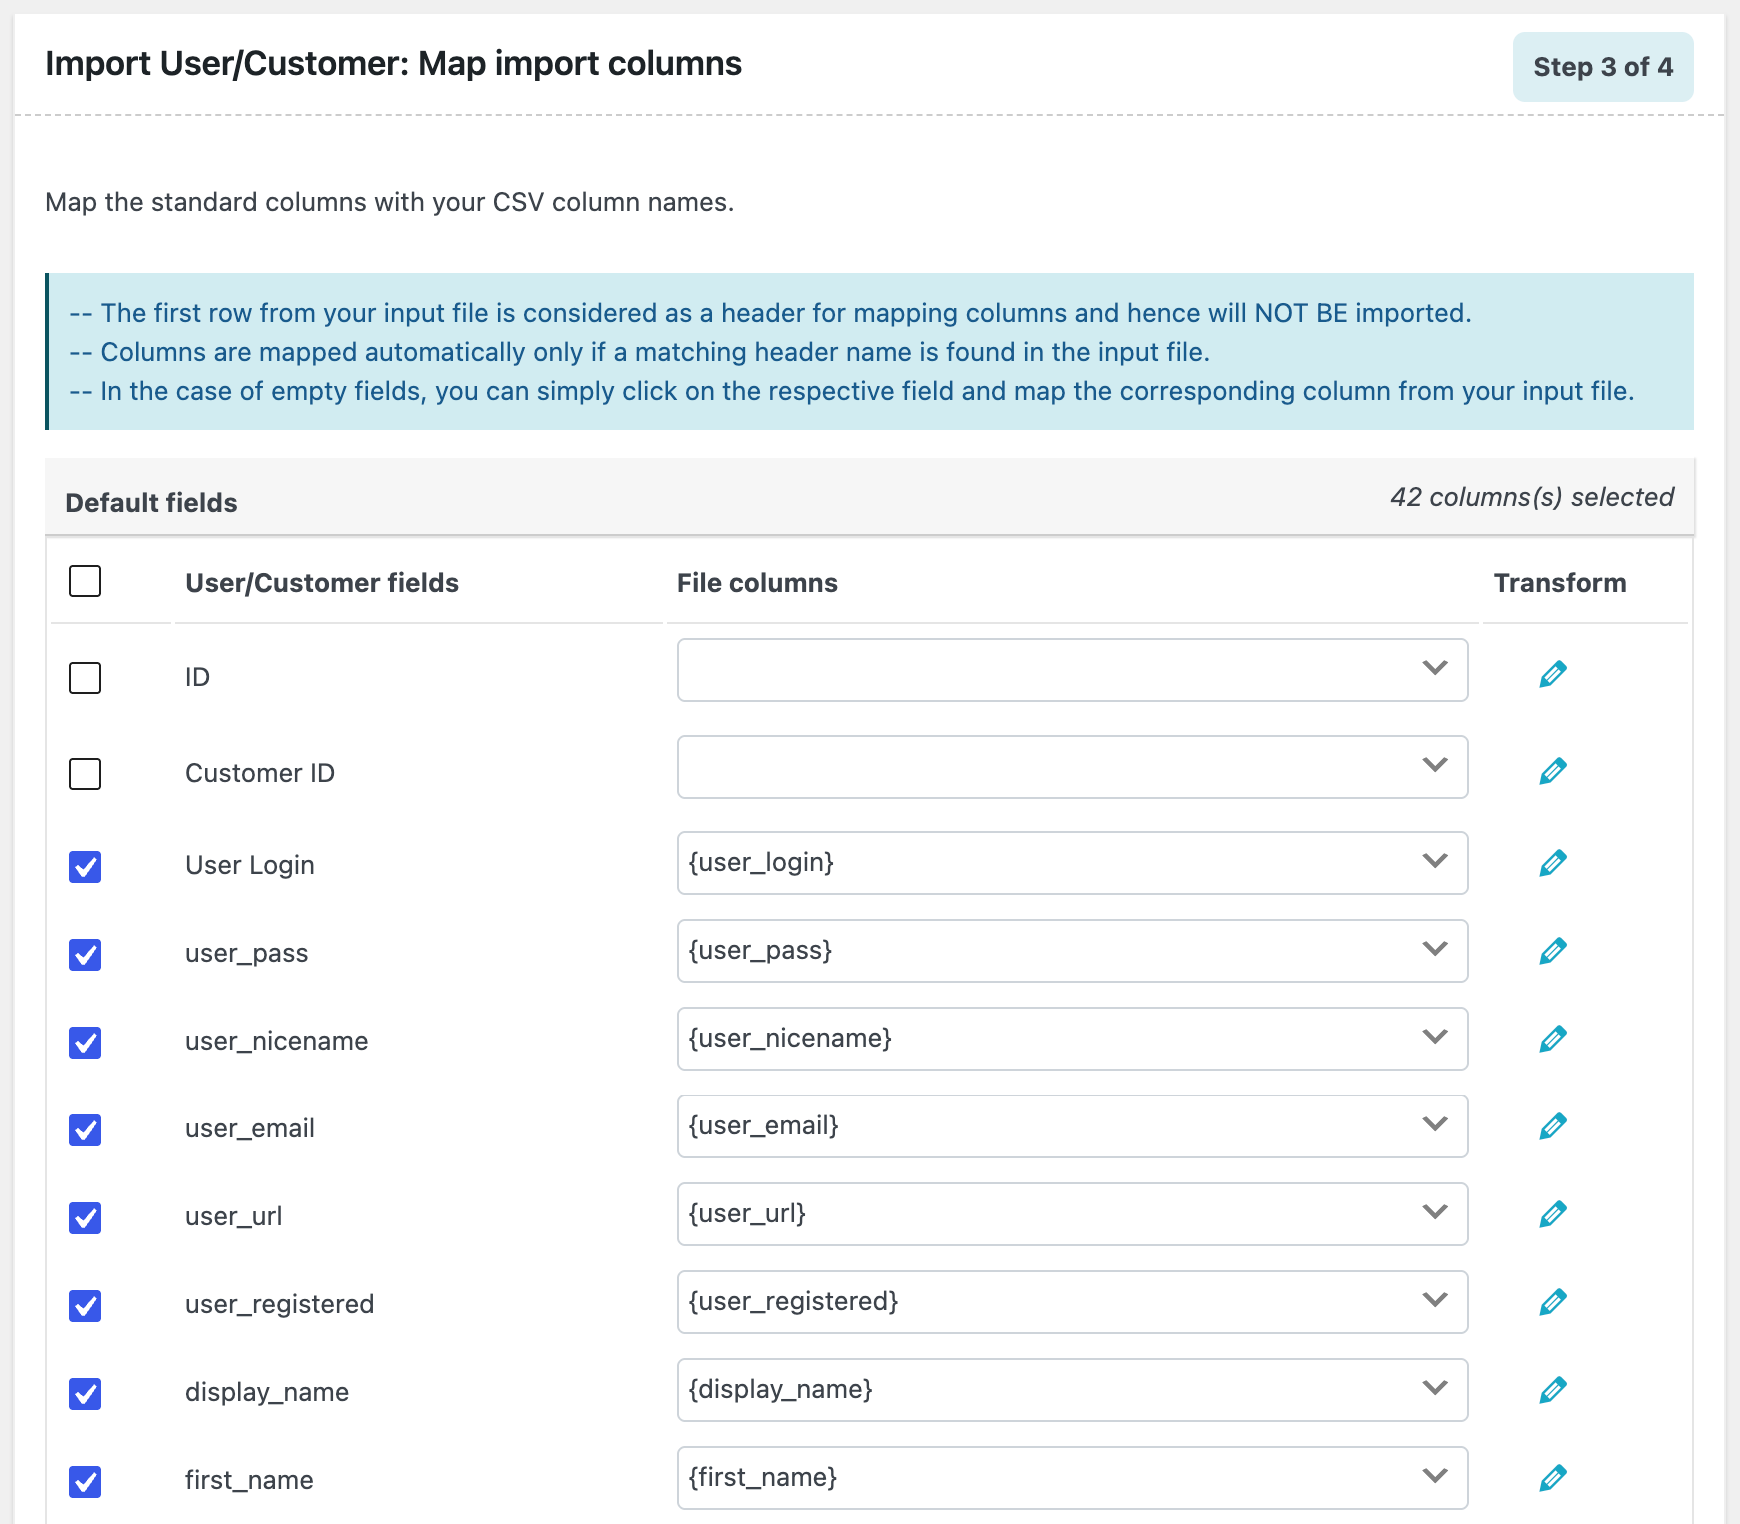
Step 3: Map Import Columns
Review the column mappings before importing. If your CSV uses the default column names, the plugin maps the fields automatically. If any fields are unmapped, simply select the corresponding CSV column.
Once you’ve verified the mappings, proceed to the next step.
Step 4: Configure Advanced Import Options
Finally, configure the advanced import settings:
- If user exists: Choose whether to skip the user or update their details using the CSV data.
- Skip guest users: Exclude guest records from being imported as registered users.
- Import in batches of: Set the number of records processed in each batch to help prevent timeout issues.
Once configured, proceed with the import.
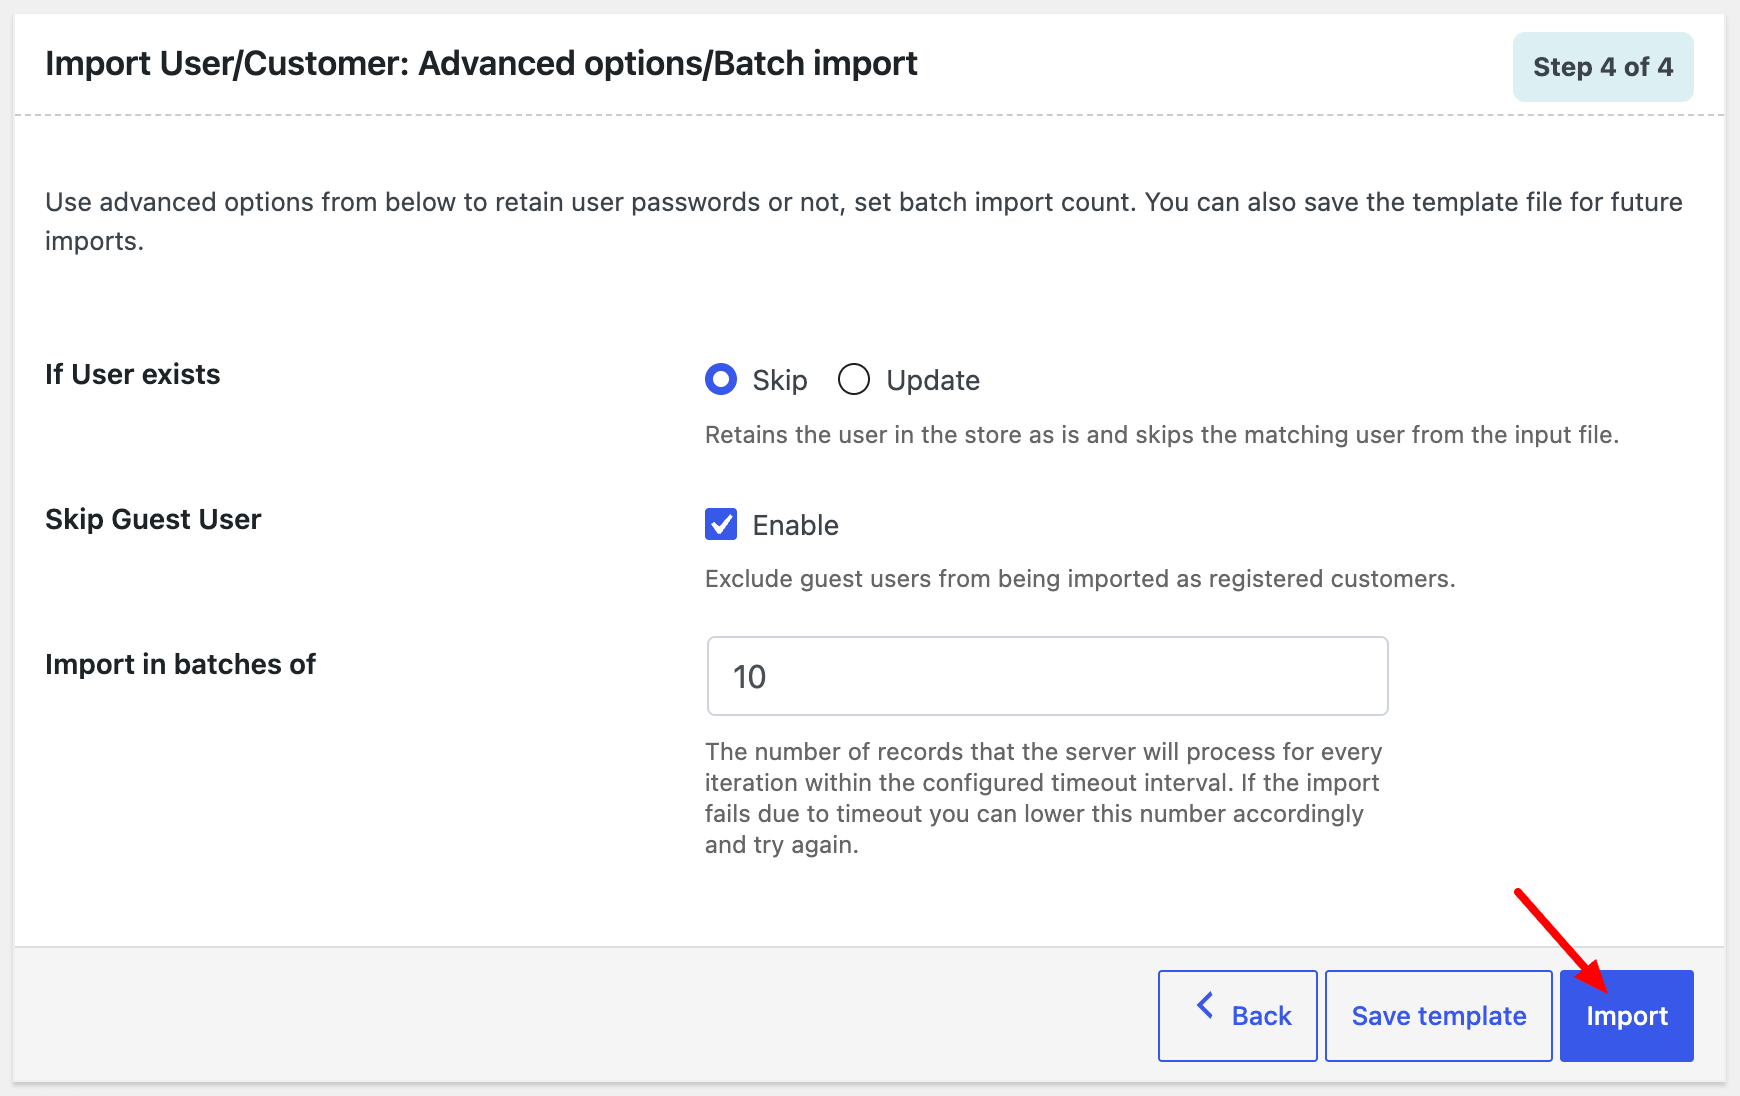
You can save your current import settings as a template for future use or import the users immediately.
Click Save Template to reuse these settings later, or click Import to begin the import. Once the process is complete, a confirmation message will appear along with any failed records, if applicable, so you can review and fix them.
That’s it! You’ve successfully imported WordPress users using the WebToffee User Import Export plugin.
Wrapping Up
The free plugin makes it easy to import and export WordPress users and WooCommerce customers using CSV files. For more advanced features, the premium version of WordPress Users Import Export supports multiple file formats, automated scheduling, additional customization options, regular updates, and priority support.
WebToffee also offers a Product Import Export plugin for tasks such as importing product images, along with an Order Import Export plugin for efficiently transferring and migrating WooCommerce order data.
Recent Comments