When your WooCommerce store is small, one stock number feels enough. But the moment you start selling from more than one place, like a main warehouse plus a store room, or two different cities, inventory can get messy fast. One wrong update can lead to overselling, delayed delivery, refunds, and unhappy customers.
That is why Multi Location Product & Inventory Management for WooCommerce matters. It lets you manage stock separately for each warehouse or store and show the correct availability based on the customer’s selected location. It also keeps pricing and fulfillment tied to that same location, so orders are handled from the right place.
Read the full article to learn how to track your stock and Inventory Smartly with Multi Location Product & Inventory Management for WooCommerce and make sure every order is fulfilled from the right place.
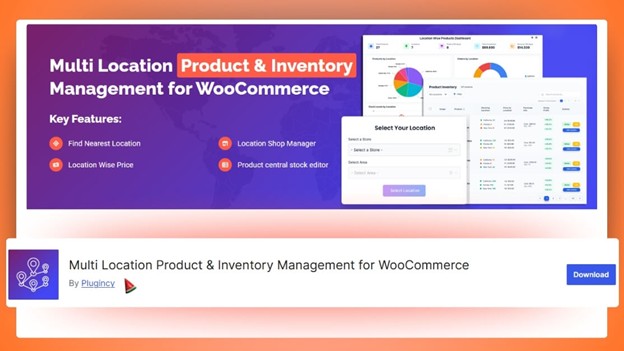
What is Multi Location Product & Inventory Management for WooCommerce?
Multi Location Product & Inventory Management for WooCommerce is a plugin that helps you run one WooCommerce store while managing stock across multiple locations, like warehouses, retail shops, and city branches. Instead of relying on one shared stock number, you can set inventory separately for each location and show real-time availability based on the customer’s selected location.
If you need smooth multi inventory management for WooCommerce, this plugin gives you cleaner handling. You can create locations, edit inventory where you already work, and push bulk updates in one go. So you can grow into more locations without turning inventory management into a constant manual task.
Key Features of Multi Location Product & Inventory Management for WooCommerce
Managing inventory across multiple locations can quickly become complex as a store grows. Multi Location Product & Inventory Management for WooCommerce brings structure to stock, pricing, and order handling by location, all from one place. Below are the features that make it effective for everyday store operations.
- Location-Wise Stock Tracking: Each warehouse or store keeps its own stock count instead of sharing one total number. This helps prevent overselling and ensures orders are fulfilled only from locations with available stock.
- Location-Wise Pricing Control: Prices can be set differently for each location. This is useful when costs vary by area, such as delivery charges or local demand, without creating separate products or stores.
- Customer Location Selection: Shoppers can choose their preferred store or delivery location before adding products to the cart. Once selected, the site shows the correct stock, price, and options for that location.
- Central Inventory Dashboard: All inventory across locations is managed from one dashboard. Store owners can quickly view stock levels, make updates, and avoid opening each product individually.
- Automatic Nearest Location Detection: The system can detect a customer’s location and automatically select the closest store. This saves time and helps route orders to the most practical fulfillment point.
- Rule-Based Order Fulfillment: Orders are automatically assigned to the right location based on stock availability, nearest store, or priority rules. This removes manual decisions and speeds up order processing.
- Social and Activity Notifications: Instant alerts notify teams when stock changes, restocks happen, or important inventory actions occur. This keeps everyone informed and helps prevent missed restocking.
- Bulk Import and Export for Stock Updates: Stock can be updated in bulk using CSV or Excel files. This is helpful for large catalogs, regular restocks, or moving inventory data between systems without manual edits.
Benefits of Using Multi Location Product & Inventory Management for WooCommerce
Multi-location selling sounds simple until you try to keep stock, pricing, and fulfillment in sync across warehouses and stores. To make that day-to-day work easier, here are the benefits you get with Multi Location Product & Inventory Management for WooCommerce.
Fewer Stock Mistakes And Less Overselling
With stock set per location, you are not guessing which branch has inventory. That means fewer “sorry, out of stock” messages after checkout, fewer cancellations, and far fewer situations where staff have to scramble to find items last-minute.
Faster Fulfillment And Better Delivery Speed
When orders are tied to a specific location, your team can pack and dispatch more quickly because the “ship from” point is clear. For businesses with branches in different areas, this can also reduce delivery time by fulfilling closer to the customer.
Clear Control Over Pricing By Location
Not every area has the same costs or market prices. Location-based pricing lets you set prices that match each region without duplicating products or running separate WooCommerce stores, which keeps your catalog simpler to manage.
Smoother Store Pickup And Location-Based Shipping
If you offer pickup, customers can choose a location and place an order with confidence, knowing the item is available there. When you use shipping zones, location-based inventory also helps keep delivery options accurate for each region.
Better Team Workflow And Less Manual Work
Instead of checking spreadsheets or asking another branch for updates, your team can rely on the system. Orders show the location context, stock is updated per location, and daily operations become easier to handle, even when your order volume grows.
Stronger Reporting For Smarter Decisions
With location-level visibility, you can see which branch is selling more, which location runs low often, and where stock is sitting too long. That makes restocking and stock transfers more planned, not rushed.
Easier Growth When You Add New Locations
Adding a new warehouse or store does not mean rebuilding your store setup. You can add the new location, assign stock, and continue operating from the same WooCommerce site, which makes scaling feel far less stressful.
How to Set It Up (Installation + Basic Configuration)
Setting it up is not hard, but the order matters. Install the plugin first, then add your warehouses or stores, set stock for each location, choose how orders should be assigned, and finish with a quick test so everything works the way you expect. Here are the details broken down into easy steps:
1) Install and Turn It on
Start by getting the multi-location inventory plugin installed properly. Taking a minute here helps you avoid setup headaches later, especially if you plan to use the Pro features.
- From WordPress Admin, click Plugins → Add New
- Search for Multi Location Product & Inventory Management for WooCommerce

- Select the correct plugin, then click Install Now
- After it installs, click Activate
2) Install the Pro Version and Activate the License
If you purchased Pro, you will usually receive a separate Pro ZIP file and a license key. Installing Pro first and activating the license early makes sure every advanced option shows up while you configure locations.
- Upload the zip file from Plugins → Add New → Upload Plugin
- Install it and click Activate Plugin

- Find Location Manage → Plugin License in the admin menu
- Paste the license key from your purchase email
- Click Activate License to unlock Pro settings
3) Configure The General Settings
Before adding locations and stock, spend a few minutes in the general settings so the plugin behaves the way your store needs. Getting these basics right now saves you from fixing location, stock, and order issues later.
- Open the plugin settings from Location Manage → Settings
- Pick the location display format so you can control where the location selector shows up on your site
- Enable location stock, location pricing, and any other location-based settings you plan to use

- Explore the other option tabs and switch on the features you need for your store setup, then save your changes
4) Create Store Locations
To assign stock, you need to create your locations first. You can create as many locations as you need with this plugin. Use clear names like “Warehouse East” or “Store A” to manage orders and avoid mistakes during fulfillment.
- In the left menu, choose Location Manage → Locations
- Click Add New Location

- Add the location name and any details you want saved
- Save the location
- Repeat for every warehouse, store, or branch you operate
5) Assign Stock to Each Location for Every Product
Now connect products with the locations you created. This is where the plugin becomes useful because stock stops behaving like one shared number and starts acting like real inventory per branch or warehouse.
- Visit Products → All Products, then edit a product
- Find the Location area and select the locations where the product should be available
- In Product Data, choose Inventory and enable stock tracking

- Switch to Location Settings and enter the stock quantity for each selected location
- Save changes by clicking Update
6) Set How Orders Should Pick a Location
Once stock exists per location, decide how orders should be assigned. Good rules reduce manual work and make sure the right warehouse gets the order automatically, based on how your business operates.
- In the plugin settings, locate the Order Assignment options
- Choose the method that fits your store, such as:
- Closest Location for distance-based fulfillment
- First Location With Stock for simple, priority-based routing
- Manual Selection if your team prefers choosing during processing
- Save the settings after selecting your preferred method
7) Turn on Pickup or Configure Location-Based Shipping
If you offer pickup or ship differently based on region, set that up next. This step helps customers see the correct options and helps your store match orders with the right fulfillment point.
- For pickup, use WooCommerce → Settings → Shipping → Pickup Settings
- Enable pickup and select which locations support it

- Assign areas to zones, then map the right warehouse or store to each zone
8) Review Reports, Then Run a Few Test Orders
Before you rely on it daily, check the reporting screens and test how stock changes when orders come in. A short test run confirms that location selection, stock deduction, and routing are all working correctly.
- Check stock and order data inside Location Manage → Dashboard or Analytics

- Look for low stock alerts and location-level performance
- Try a few test purchases and change locations during checkout
- If anything looks off, adjust stock, assignment rules, or shipping zones, and test again.
If you prefer learning by watching, the video makes the setup feel much easier. It shows the full process from the dashboard, so you can follow the exact settings.
Free Multi Location Product & Inventory Management for WooCommerce Plugin
How Orders Get Assigned to a Warehouse or Store?
Once your locations and stock are set, the next big question is simple: which warehouse should ship each order? The plugin handles this by assigning a fulfillment location based on the rules you choose, so your team does not have to guess or waste time checking stock manually. Here’s how:
Assigned Based on the Selected Location
When a shopper chooses a location while browsing, that selection becomes the main reference for the order. The checkout follows the same location, so the order is treated as a branch-specific purchase, and the fulfillment team knows exactly where it should be handled.
Automatic Location Matching When Enabled
If automatic selection is turned on, the plugin can choose a store location for the customer without extra steps. This keeps the shopping flow smooth while still connecting the order to a location, so stock display and fulfillment decisions stay consistent from start to finish.
Stock Aligned With the Assigned Location
The order depends on the stock set for the chosen location rather than one shared store-wide stock number. This helps prevent situations where the system assigns a location that cannot fulfill the order, because inventory is managed and checked at the location level.
Handles Carts With Items From Different Locations
Some carts may include items linked to different locations, especially when customers browse without paying attention to location changes. In those cases, the plugin can keep the location context during checkout, so the store does not lose track of which items belong to which branch.
Location Visibility Inside Order Management
After an order is placed, location details show inside WooCommerce order management so staff can identify the fulfillment branch quickly. This makes day-to-day processing faster, reduces internal confusion, and helps managers review which locations are handling the most orders.
Manual Location Control for Special Fulfillment Decisions
Automatic assignment is useful, but some orders need human decisions, like urgent delivery requests or internal stock balancing. The plugin allows admin-side control so you can choose or adjust the fulfillment location when needed, without changing the customer’s shopping flow.
Common Mistakes You Should Avoid During Setup
Small setup slips can cause big confusion later, especially when orders start coming in from different locations. Before moving forward, check these common mistakes so stock, pricing, and order routing work smoothly from day one.
- Skipping General Settings First: Many store owners add locations right after activation, then wonder why location stock or pricing is not working. Turn on the core options in General settings first so everything behaves correctly.
- Using Vague Location Names: Names like “Store 1” or “Warehouse 2” sound fine early on, but they create confusion during fulfillment. Clear names like “Warehouse Dhaka” or “Outlet Gulshan” reduce wrong dispatches.
- Entering Stock Only in WooCommerce Inventory: Adding quantity only in the default WooCommerce stock field does not set location-level stock. Stock must be entered for each location; branches cannot be tracked properly.
- Forgetting to Add Location Prices: Prices will not change just because location pricing is enabled. If you need different prices by location, add regular and sale prices for each location inside the product’s location settings.
- Setting Order Routing Too Late: Leaving order assignment rules for later usually leads to manual location selection on every order. Configure routing early so orders automatically go to the right location.
- Ignoring Shipping Zones and Pickup Setup: Location-based shipping and store pickup depend on correct WooCommerce shipping settings. If zones and pickup locations are not set, customers may not see the right options.
- Missing Variation Stock For Variable Products: Variable products need a stock set per variation and per location when required. If variations are skipped, customers may see incorrect availability.
- Going Live Without Testing Location Switching: A few test orders reveal issues with stock deduction, pricing changes, and location assignment. Testing with two or three locations helps you fix problems before real customers notice.
Final Note
Managing inventory across multiple warehouses or stores can feel simple at first, but the cracks show fast when orders increase. A small stock mismatch turns into cancellations, late deliveries, and extra support messages. The right multi-location setup keeps things clear: each location has its own stock, pricing stays consistent with your rules, and orders are easier to route and fulfill.
As you learned to track your stock and inventory smartly with multi location product & inventory management for WooCommerce, start upgrading your store with that, test real orders, then scale as you grow.
Recent Comments